GitHub Tutorial for Beginners
Updated by Ponrawee Prasertsom on Oct 23, 2023 (see Authors for full history)
Table of contents
Introduction
What is GIT?
GIT is a piece of software that allows you to save your work at any given moment in time. It’s typically called a version control system, which essentially means that it allows you to create versions of your workspace and makes it possible to switch between older and newer states.
There is a good chance that you are already familiar with version control if you have used a feature called revisions or history in software such as Google Docs or Microsoft Word to “go back in time” and see previous versions of your document. GIT is the same thing, but instead of having different versions of just your documents, you can use GIT to save and retrieve the states of any files in your project.
More
You can think of it like a video game. After hours of struggle, you get to a certain level in the game. You’re really proud of how far you’ve come, and don’t want to do it over again in case you die. So you decide to save your game. If something bad happens after that point you can always reload your game and start from that point onwards.
This is exactly what happens with GIT: however, instead of calling it saving your game, we call it committing your changes. A “change” is a file modification you have made.
Check out the following short clip to learn about the essentials of GIT:
What is GitHub
GitHub is an online software development platform that allows you to store a copy of your files whose changes are tracked by GIT (called repositories) online. GitHub allows us to freely store the files online (or remotely, as most developers call it), and work together with others using one central (remote) repository.
Using GIT
There are two main ways you can use GIT. The first is to use it using command lines, where you directly type commands to work with GIT. This is the traditional way and provides you with great flexibility, but can be tough for beginners with little experience. If you are interested in working with GIT this way, you can check out GitHub’s guides on how to use GIT. This guide will instead focus on how to use a graphical program (a program with buttons, menus, and the like) called GitHub Desktop instead.
More
Getting started
-
Install GitHub Desktop
-
Create a GitHub account
-
Start GitHub Desktop and log into your account (Go to File → Options → Accounts → Sign in). See the guide on GitHub for a step-by-step.
Starting a local repository
In order to start tracking changes with GIT, you need a repository, which is basically a folder where you put all your files you want to track in. To start a repository, go to File → New repository. Give it a name and (if you’d like) description. For technical reasons, your repository name should not contain spaces. If you need a space, try using hyphens (-) or underscores (_) instead.
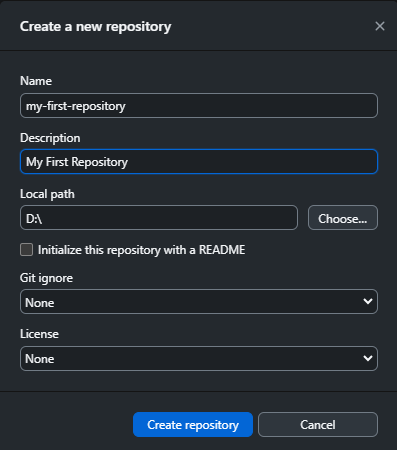
Then, under the Local path section, choose where your repository will be, locally (local(ly) here just means “on your computer”). You can ignore the other options for the moment (but see GitHub Docs if you wish to learn more about them). Once you are done, click Create repository. This will create a folder inside the folder you specify as local path. For example, on Windows, if you name your respository my-first-repository and choose the local path as D:\, the program will create a new folder named my-first-repository in your D drive.
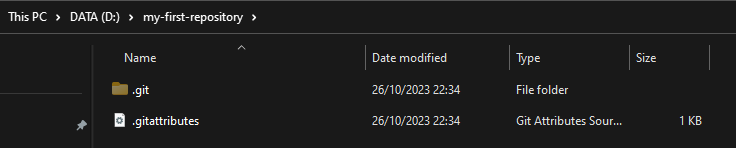
The created folder (my-first-repository in this example) is your local repository, meaning that changes within this folder are trackable by GIT. You can try going to the path that you specified, and you will find your repository folder there. Depending on how you’ve configured your operating system, inside the repository folder, you may see a folder named .git and perhaps other files whose names beginning with .. These are files required for GIT to work correctly. It is best not to touch them unless you know what you are doing.
Starting a repository in an existing folder
Sometimes you already have your folder that contains all the files, and just want to start a repository within the folder to start tracking file changes. This can be done and is simple, but you have to be careful about where your folder lives. The steps to start a repository remain the same, except that you have to choose the parent folder of your project folder. This means, for example, that if your project folder is called my-project and is inside D:\, you want to choose D:\ (NOT D:\my-project) as your local path.
Saving your changes as revisions (commits)
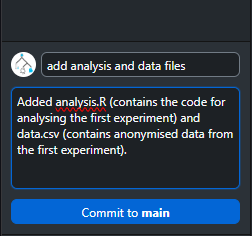
Once you have started a local a repository, you can close GitHub Desktop and start working/continue your project as normal. You can create/edit files, write codes, etc. Whenever you feel like you want to save the state of your project as a “revision” (called a commit in Gitspeak), start GitHub Desktop and open your repository. On the bottom left of the screen, write a summary of your changes, and, optionally, a longer description, then click Commit to main.
This will create a new commit in the history of your repository. This is reflected in the history tab, which will tell you not only the commit summaries but also what the changes to your files are (if they are text-based).
You can make as many commits as you want, as frequently as you want. It is good practice to commit after a change that you feel is “significant”. For example, you may commit after you finish writing the script to plot your data. Note that these commits are only “checkpoints” that live on your computer. If you want to upload your files and the history of their changes to GitHub, you need to push the commits. The next section explains how to do this.
Publishing your repository (pushing)
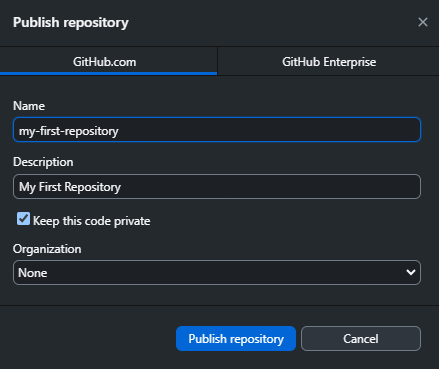
To upload the files and their change history to GitHub for the first time, click Publish repository. You can set a different name and description for your remote repository (remote because the folder that will be stored on GitHub). Uncheck Keep this code private if you want your repository to be publicly accessible on GitHub, otherwise keep it checked. You can ignore Organization for the moment (learn what it is here). When you are done, click Publish repository.
After you’ve published for the first time, the button will turn into either Fetch origin (if you have not made any further commits) and then Push origin (if you have made further commits since your last push). The Fetch origin button is for when you or your collaborator make changes to your GitHub repository from other places, and you want those changes to be reflected on your computer. The Push origin button is for uploading further commits to your GitHub repository. If you work alone on a single computer, it is likely that you will mostly be pushing and not fetching. Remember: if you do not push, your commits will only stay on your computer!
If you’ve published your repository, you should be able to access it on GitHub at https://github.com/[your-github-username]/[your-repository-name]. If it is private, it will only be accessible if you are logged into GitHub. You will be able to see your files and folders on GitHub.
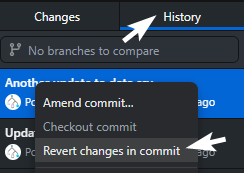
Undoing (reverting)
If you want to go back one step (undo the last commit), you can go to the History tab, right-click on the last commit (the top one) and click Revert changes in commit. This will create a new commit that undo the changes. Recall that you still need to push if you want this change reflected on GitHub.
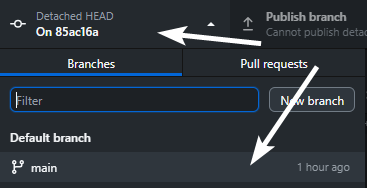
You can go back even further to a specific commit, but unfortunately there is no elegant way to achieve this through GitHub Desktop. If you only want to get an older version of some file, and not the whole project, one slightly convoluted way you could do it is to checkout a specific commit (Right-click → Checkout commit). This will temporarily return your folder to that commit’s state. You can copy the files you want from that commit and paste somewhere them outside the repository folder. Then, go back to the main branch by going to the branch menu, and click on main. This will return your repository back to your latest commit. You can then replace the files with what you have copied earlier and commit the changes.
For a more elegant, less hacky way to achieve this, you can look into using Git via command lines, specifically at the commands git reset, git revert and git checkout. Familiarise yourself with the basics of GIT command lines, and see the guide about these commands here.
Advanced topics
If you are interested in working with command lines, you can learn GIT the traditional way.
For a more detailed guide on GitHub Desktop, check out the official documentation.
You can work on a different “timelines” of your projects with branches.
If you want to develop a project based on someone else’s existing code, you can use forks.
As a sum-up, try this GitHub ‘Hello World’ Project.
Acknowledgement
This tutorial draws from a combination of sources, chiefly the GitHub documentation and HackYourFuture’s teaching material, maintained by their awesome volunteers.
Authors
- Bonan Zhao (Aug 1, 2021; Original author)
- Georgia-Ann Carter (Nov 10, 2022)
- Ponrawee Prasertsom (Oct 26, 2023)